Have you ever wondered if the lush greens sprouting in your AeroGarden can thrive beyond their watery confines? You're not alone. Many gardening enthusiasts contemplate whether these hydroponically grown plants can adapt to traditional soil environments. The short answer is yes, but the change requires careful planning and execution. As you consider the possibility of expanding your garden's horizons, think about the potential benefits and challenges that come with transplanting. What steps should you take to guarantee a smooth shift, and what might be the implications for your plant's health and growth? Let's explore together.
Key Takeaways
- Yes, plants can be transplanted from an AeroGarden to soil once their roots have adequately filled the grow basket.
- Choose a high-quality potting mix with good drainage and aeration to facilitate a smooth transition.
- Gradually acclimatize AeroGarden plants to outdoor conditions to prevent shock and promote healthy growth.
- Carefully untangle and spread out the roots during transplantation to encourage proper root development in the new medium.
- Monitor the transplanted plants for signs of distress, such as wilting or yellowing, to ensure successful adaptation.
Understanding AeroGarden Plants
Before transplanting your AeroGarden plants, it's crucial to understand how they grow in their unique, soil-free environment. Your AeroGarden uses a hydroponic system, which means the plants are grown in water enriched with nutrients instead of soil. This method promotes faster growth and higher yields, giving you more control over your gardening success.
In your AeroGarden, plants receive an ideal balance of water, oxygen, and nutrients directly to their roots. This efficient delivery system allows for quicker growth rates and reduces the chances of disease and pests that are common in traditional soil gardening. You'll notice that your plants might develop smaller root systems compared to soil-grown counterparts, but they're highly effective in absorbing nutrients.
The lighting in your AeroGarden is also tailored to maximize plant growth. The LED lights provide the full spectrum of light needed for photosynthesis, which keeps your plants thriving even without natural sunlight. You can adjust the light intensity and duration, ensuring your plants get just the right amount of light, regardless of the season or your home's natural light conditions.
Assessing Root Health
Now that you understand how your AeroGarden plants grow, let's examine the health of their roots. Ensuring your plants' roots are healthy is vital before even thinking about transplanting them. It's all about taking control of the situation to avoid transplant shock and subsequent plant failure.
First, check the color of the roots. Healthy roots are generally white or slightly off-white. If you're seeing brown or black roots, that's a sign of potential root rot or other diseases. Don't worry—if you catch it early, you can address it before things get out of hand.
Next, feel the texture of the roots. They should be firm and robust, not slimy or mushy. Slimy roots often mean there's too much moisture around them, and you'll need to adjust your watering practices.
Also, look at how the roots are growing. They should be spreading out evenly, not clumping or tangling excessively. Dense, tangled roots might require gentle separation before you transplant, ensuring they can spread out and thrive in their new environment.
Choosing the Right Time
Choosing the right time to transplant your AeroGarden plants is essential for their survival and growth. You'll need to pinpoint the perfect moment when your plants are mature enough to handle the change but still young enough to adapt quickly to their new environment. Generally, this is when the roots have filled the grow basket but aren't extensively tangled or overgrown.
Monitor your plants regularly. If you see roots poking out aggressively, it's a signal they're ready for more space. However, timing isn't just about root development; you also need to take into account the season. Spring and early summer offer the best conditions for outdoor planting, thanks to mild temperatures and longer daylight hours. These conditions help plants adjust without the added stress of extreme weather.
You also hold the reins on controlling the indoor environment if you're shifting to larger indoor pots. Make sure you don't rush; waiting a couple of weeks can be better than moving too soon and risking shock. Patience here allows you to optimize the change, ensuring you maintain the upper hand in nurturing your garden's success.
Preparing the Soil
Once you've determined the right time to move your plants, preparing the soil becomes your next step. You'll want to guarantee that the soil you select will support the health and growth of your transplants from the Aerogarden. Start by choosing a high-quality potting mix that promotes good drainage and aeration, critical for your plants' roots to thrive outside their hydroponic environment.
Here's a breakdown of the ideal soil composition:
| Component | Purpose | Ideal Percentage |
|---|---|---|
| Organic Matter | Provides nutrients | 30% |
| Sand | Improves drainage and aeration | 50% |
| Clay | Retains moisture and nutrients | 20% |
Make sure the soil is loose and friable, which means it's soft enough to allow roots to grow deeply without resistance. If you're dealing with heavy soil, consider amending it with sand or perlite to enhance its structure. It's also a good idea to mix in some compost or aged manure to boost the nutrient content. This is your chance to tailor the soil conditions specifically for your plants, giving you control over their post-transplant environment and maximizing their potential for success.
Acclimatizing AeroGarden Plants
Before you move your Aerogarden plants outdoors, it's crucial to acclimatize them to their new environment gradually. This process, often called 'hardening off,' allows your plants to adjust to direct sunlight, varying temperatures, and less controlled conditions than they're used to indoors.
Start by selecting a sheltered spot outside where your plants can get indirect sunlight. Over the course of a week or so, increase their exposure to the outdoors. Begin with just an hour a day, gradually extending the time by an hour daily. It's your control dial—adjust it based on how your plants respond. If you notice any signs of stress, such as wilting or sunburn, dial back and give them more time to adapt.
Also, consider the weather during this period. Avoid putting your plants out on unusually cold or windy days, as these conditions can be too harsh for tender AeroGarden transplants. Your goal here is to mimic the conditions your plants will face in their permanent outdoor location, but in a more controlled, step-by-step manner.
This careful, controlled approach ensures your plants won't be shocked by their new environment, increasing their chances of thriving post-transplant.
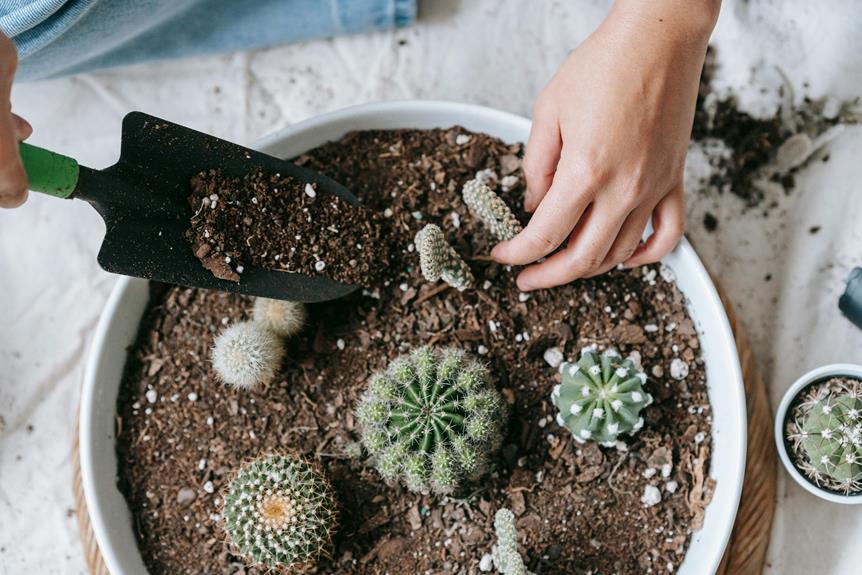
Transplanting Step-by-Step
After your plants are acclimatized, it's time to start the actual transplanting process. First, you'll need to prepare the new home for your plants. Choose a pot with sufficient drainage and fill it with a high-quality potting mix. Make sure the pot is large enough to accommodate the root system without crowding it.
Next, gently remove the plant from the Aerogarden. It's important to handle the roots with care to avoid damage. Shake off any excess water and carefully tease out the roots if they're tangled. This step ensures they'll spread out in their new environment, promoting healthier growth.
Now, create a hole in the center of the potting mix, deep enough to house the plant's root ball. Position the plant in the hole and gently fill in around the roots with more potting mix. Pat down the soil around the base of the plant to secure it and eliminate any air pockets.
Aftercare Practices
Water your newly transplanted plant gently to settle the soil and provide essential heartiness. After the initial watering, monitor the soil's moisture level daily. It's important to maintain a balance; the soil should be moist but not waterlogged. Over-watering can lead to root rot, which can be harmful.
Next, consider the lighting. Your plant's been accustomed to the LED lights of your AeroGarden, so it'll need plenty of light to thrive. If natural sunlight is insufficient, supplement with grow lights. Position these about 24 inches above your plant for best exposure.
Temperature control is another key aspect. Keep your plant in an environment with a steady temperature, ideally between 65-75°F. Sudden temperature fluctuations can stress your plant, potentially stunting its growth or causing leaf drop.
Fertilization is the final step to make sure your plant thrives. Two weeks after transplanting, begin a half-strength liquid fertilizer regimen every two weeks. This provides the necessary nutrients without overwhelming your plant.
Troubleshooting Common Issues
If your plant shows signs of distress, it's crucial to identify and address the issue quickly. First, check for common symptoms like wilting, yellowing, or stunted growth. These can be indicators of root problems. Inspect the roots; they should be white and healthy-looking. If they're brown or slimy, root rot could be the culprit. This often results from overwatering. Make sure you're following the Aerogarden's guidelines for water levels and change the water regularly to prevent stagnation.
Next, consider the nutrient balance. Are you adding the right amount of nutrients? An imbalance can stress your plants. Follow the recommended feeding schedule closely. Too much can lead to nutrient burn, while too little can starve your plants.
Lighting is another critical factor. If your plants aren't getting enough light, they'll struggle to thrive. Aerogardens typically have built-in lights, so make certain they're functioning correctly and positioned to cover all plants evenly.
Temperature fluctuations can also affect plant health. Keep your Aerogarden in an area with a stable temperature, avoiding drafts and direct sunlight from windows, which can heat up the unit excessively.
Benefits of Successful Transplanting
Successfully transplanting your Aerogarden plants can lead to stronger growth and increased yields. When you move your plants to a more traditional garden setting, they'll have the space to expand their roots and access a wider range of nutrients from the soil. This can result in not only bigger plants but also more robust ones, capable of withstanding pests and diseases more effectively.
You'll also find that you have greater control over the growing conditions. Outdoor or larger indoor environments allow you to manage sunlight exposure, watering schedules, and soil composition more precisely. This tailored approach guarantees that each plant gets exactly what it needs, maximizing health and productivity.
Moreover, transplanting extends the lifespan of your Aerogarden. By cycling new seedlings into the Aerogarden after you've moved mature plants outdoors, you're making the most of your equipment without overtaxing it. This rotation strategy keeps your garden both vibrant and productive.
Lastly, the satisfaction you'll gain from seeing your Aerogarden starters transform into flourishing garden plants is immense. It's a validation of your care and dedication as a gardener, proving that your green thumb extends beyond the confines of hydroponic technology.


Konnichiwa! (Hello!) I'm Pat Tokuyama, a Japanese tofu cookbook author, who travels for music, food, and adventure. If you like Japanese tea, checkout some of the newestorganic japanese tea, matcha bowls and noren and more!
** Curious about the Plant Based Japanese Cooking Club? ** Learn more here!