Effortless Natto Making: How to Make with Tanica Yogurtia Yogurt Maker
Disclosure: As an Amazon Associate, all day i eat like a shark earns from qualifying purchases. This post contains affiliate links — we may earn a commission at no extra cost to you.
natto is japanese fermented soy bean. it’s a little stinky and as you can imagine, when i was a little kid the first time i ate natto i hated it. then as i got older i tried it again and it’s now one of my favorite healthy foods! 😛 here’s one of the simplest ways you can make natto fresh at home – with the tanica yogurtia yogurt maker

what’s natto?
Natto (納豆) is the japanese word for fermeneted soy beans.
Thanks to little bacteria (Bacillus subtilis var. natto) it’s got a rich earthy, nutty, fermented flavor unlike anything else.
it’s pretty smelly and might stink up your kitchen while youre making it too (in a good way i hope)
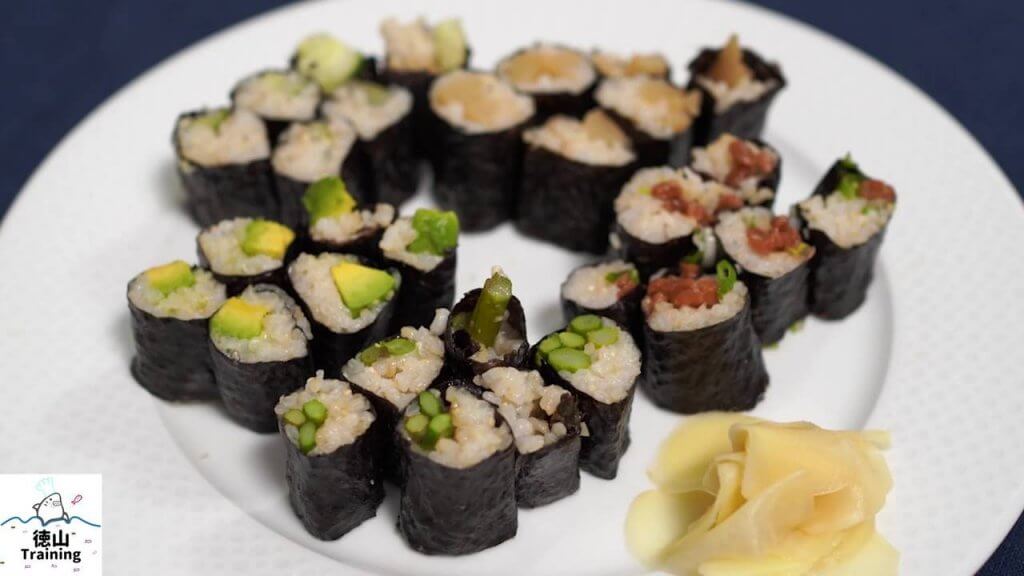
In japan, you can eat it for breakfast or even lunch and dinner for example in sushi as a natto maki.
Or just as a side with your rice!
And if you’ve ever considered trying to make it at home, I’m going to show you exactly how to do it.
all you need aside from soy beans and a starter is the Japanese yogurt maker Tanica yogurtia
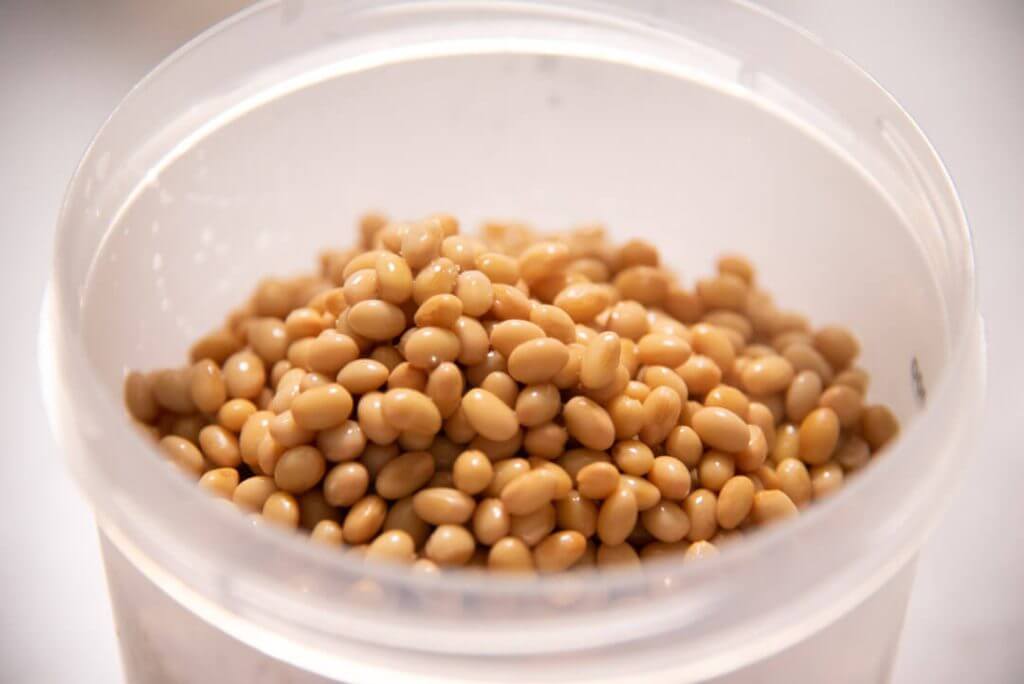

Dried natto soy beans
I’d suggest started with about 300 grams of dried natto soybeans
These are a little smaller than your standard soy beans and can be found online, such as through Laura soy beans.
Once you have the smaller natto soy beans, you want to boil them for about 40 minutes and they are nice and plump.
There’s a couple ways that you can prepare the soy beans and the other longer method is soaking them overnight for at least 10 to 14 hours, depending on the time of the year or how warm it is in your kitchen.
But I usually take the short cut and boil them.
Note the goal is not to cook the soy beans all the way through.
The reason you dont want finish cooking the soy beans in the boiling water is because they’ll also be steamed.
Just like in Japan… almost!
After boiling I add the soy beans in this stainless steel colander, and it fits right inside my pressure cooker.
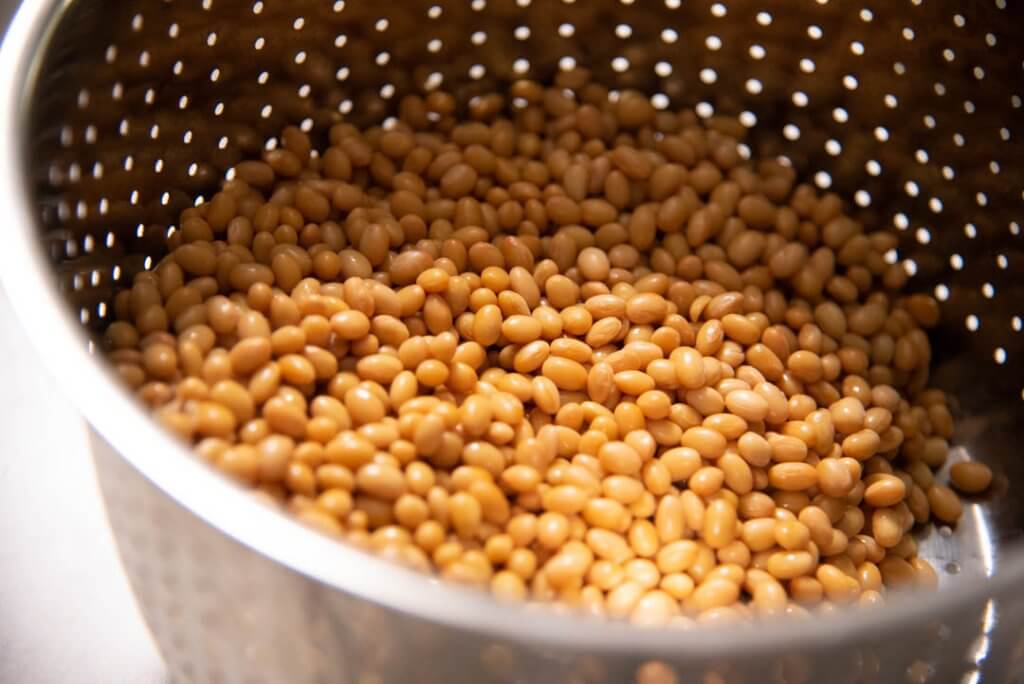
Below is the before and after steaming – note after cooking the natto soy beans turn much darker in color.
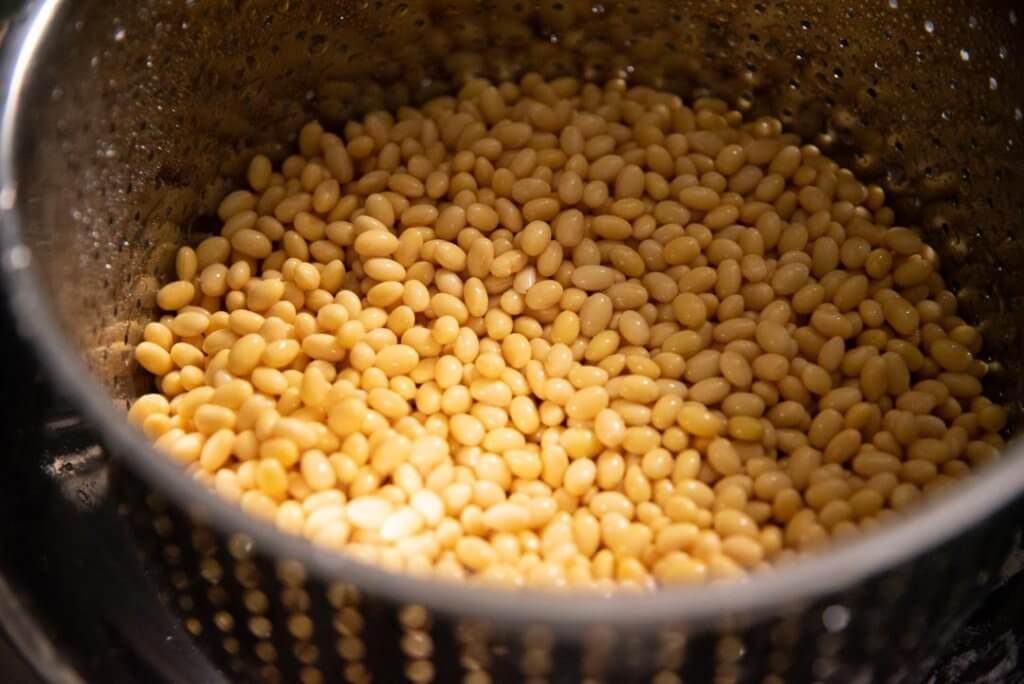
Preparing the natto soy beans for steaming in the pressure cooker
After boiling the natto soy beans, give it a little bit of a rinse.
it’s okay if you notice some of the skins falling off. o the point is to rehydrate it so that when we put it into the pressure cooker, it’ll steam evenly.
After adding the soybeans in the cooker, I add about an inch of water, and turn on the heat on high
After cooking about 40 minutes you’ll notice that the beans have become nice and soft.
And the way that you know that they’re done is you can squeeze them.
When the natto soy beans smush easily they’re done.
And if it’s still a little bit hard, you might need to pressure cook it a little bit longer.
But usually about 40 minutes, 30 or 40 minutes is good enough for me.
Fermenting the soy beans into natto
So we’re gonna be fermenting it in this little Japanese Tanica Yogurtia yogurt maker.
Yogurtia is a Japanese yogurt maker, and this thing does a really good job in controlling temperature.
So if you’ve never made natto before, one of the key things, one of the most important things is to regulate the temperature.
This yogurt maker makes that simple and easy.

Also, what we’re going to be doing, instead of using nattomoto, which is natto starter, we’re gonna be using a real pack of natto here.
Personally i prefer the taste from natto packs as compared to the starter, but you should try both and see which you prefer.
We’re gonna just take out about a quarter piece of this, and then mix it in with the cooked soybeans once they’re cooled, and then we’re gonna let it ferment.
You’re gonna control the temperature with the yogurt maker, and then we’re gonna let it ferment, and then it’ll be done in just under a day.
So pretty quick!
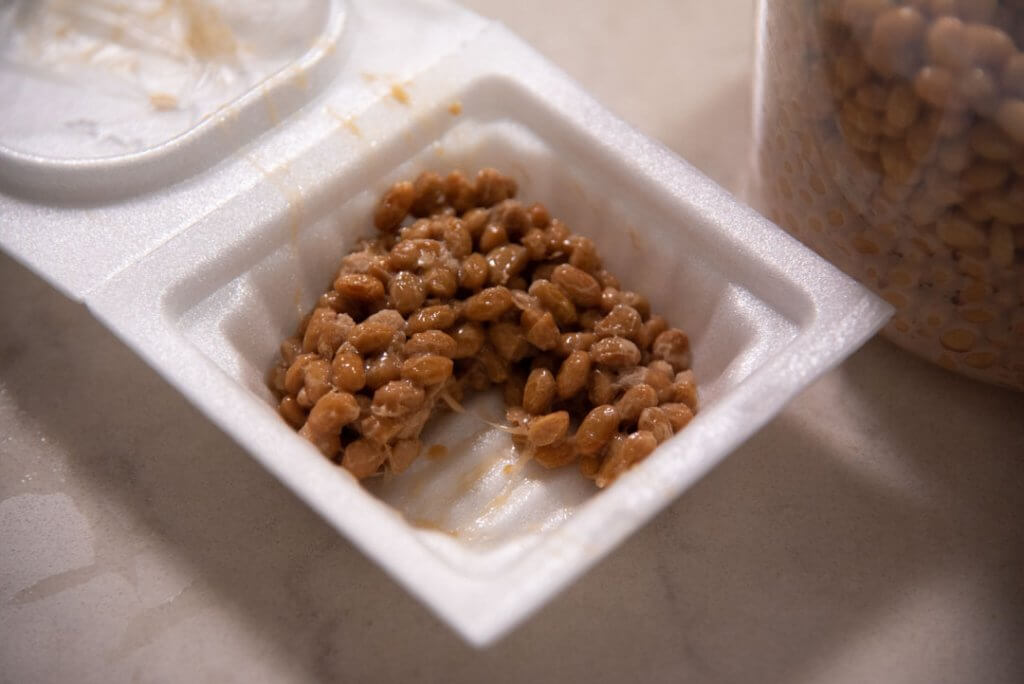
Note: I’ve made natto several times and the first time I did it was with my bread proofer and it didn’t really turn out too good because I let it over ferment. And so, it was super ammonia-ey, which is not a pleasant taste or smell. So I tossed that. The Tanica does a much better job and evenly distributes the heat – and with my first try I made homemade natto a stinky success! So that’s one of the reasons why I highly encourage you to get one of these Yogurt makers if you don’t have one already.

Tips for making homemade natto a success
One thing that you need to keep in mind is you want to be as sterile as possible because you don’t want any competing microorganisms to try to eat the soybeans.
I wiped the container with alcohol, same with my spatula, make sure both of those are sterile.
Like I mentioned, the temperature you ferment the soy beans is key.
We’re gonna be fermenting this at about 45 degrees C, which is about 112, 113 degrees Fahrenheit, anywhere from 24 to 48 hours.
You want to check on it at the 24-hour mark to make sure that it is fermenting as you’d expect.
It should be a little bit stinky by then.
The longer that you let the natto ferment, the more fermented it’s going to get. And you want to avoid over fermenting it because then it’ll start to get really ammonia-ey.
So if you notice like sort of an ammonia smell, that might be time to take it out and stop the fermentation.
When you mix in the natto starter (nattomotto) or the quarter piece of natto pack, ensure you evenly distribute it. Make sure all those chunks, if there’s any chunks, of natto are broken up so that they’re individual pieces. But basically what we’re trying to do is trying to get as many of the soybeans into contact with the already fermented natto for an even fermentation.
After fermenting the natto it needs to rest in the refrigerator, if it’s a little ammonia-ey don’t worry as it does mellow out in the refrigerator after several days.
The natto will also continue to ferment though with the lower temperature, you slow it down, and the bacteria, little microorganisms, further penetrate into the natto beans so that the flavor is complete.

more tips for you when making homemade natto
you’ll need to keep a few things in mind –
1. the soy beans are best steamed rather than boiled (as you finish watching the video, you’ll notice we cheated a bit)
2. you can use natto starter (powder) or a section of a natto packet to seed your soy beans
3. the temperature and duration are extremely important. too hot or cold and the natto won’t ferment, too long and the natto will over ferment resulting in an unpleasant ammonia taste and smell. use a thermometer if needed
4.even when the natto is fermented just right, it’ll have a bit of ammonia smell and flavor, but it will mellow out after a few days in the refrigerator. taste it on day 0 and day 7 and you’ll notice a big difference in the flavor of the natto.
5. i’ve found 24 hours to be just right with this tanica yogurtia yogurt maker. which i bought specifically for making natto and a few other homemade things like yogurt.
6. the recipe i made above makes a good amount of natto, so if youre not gonna eat it right away, allow it to rest a few days and freeze a portion.
Why make homemade natto?
I think the biggest difference for me when I’m making a homemade natto is the texture.
if you’ve ever been to Japan and had natto in Japan as opposed to the natto that you can get here in the US, the texture is very different.
I guess the flavor is slightly different, but it’s not as noticeably different as the texture.
So I think that’s the biggest benefit to making homemade natto.
it’s just like the way it is in japan!
Also of course the satisfaction of making something with the help of microorganisms is always fun too.
At least for me!
how to eat your natto?
If you’re eating the natto alone, common toppings include
- karashi (japanese mustard)
- soy sauce
- tare (sweet soy sauce based seasoning)
- green onion
Natto goes well with many different foods too. For example
- white rice
- in sushi (makizushi – sushi rolls)
- in miso soup
- and more!

how to make natto | with the tanica yogurtia yogurt maker video
If you enjoyed this video, subscribe for more videos like this one if you haven’t already, leave any questions or comments below. Give me a thumbs up if you enjoyed it. And I’ll see you guys in my next video.
Print
how to make natto | with the tanica yogurtia yogurt maker
- Prep Time: 30 minutes
- Cook Time: 120 minutes
- Total Time: 24 hrs+
- Yield: 2 pints 1x
- Cuisine: Japanese
Ingredients
Scale
- 300 grams dried natto soy beans
- nattomotto starter or 1/4 pack natto
- water as needed
Instructions
- Boil the soybeans for 30 to 40 minutes. Strain in a colander. Give it a little bit of a rinse to remove loose soy bean skins.
- In a pot or pressure cooker with about an inch of water, turn the heat on high. Place a pressure cooker safe colander in the pressure cooker and steam the soybeans for about 40 minutes until the beans have become nice and soft. The way that you know that they’re done is you can squeeze it and it’ll get smushed. If it’s still a little bit hard, you might need to pressure cook it a little bit longer.
- In the meantime, prepare your Yogurtia yogurt maker by sterilizing the container and spatula that you will be using to make the natto.
- Once done, transfer the steamed natto to the container. If still warm, allow to cool to 45C ~ 112 F prior to mixing with nattomoto starter or wedge from natto pack.
- Take a quarter of packaged natto and combine it with the steamed natto to evenly distribute it. Make sure all those chunks of natto are broken up so that the individual pieces are in contact with the already fermented natto. You can also use a little amount of nattomoto powder instead of packaged natto. Follow directions that came in package for scoop size.
- Put the lid on the container. Place the container in the Yogurtia yogurt maker. Set the temperature to 45 degrees Celsius and set the timer on 24 hours. Hit start.
- After 24 hours, check on your natto. It should be stringy and gooey and smell stinky.
- Allow to ferment longer if desired.
- Once finished, allow to rest in the refrigerator 5-7 days for the best flavor. After resting, freeze extra natto if not using right away
Troubleshooting Homemade Natto
Natto fermentation is sensitive but forgiving once you understand what can go wrong. Here are the most common problems and how to fix them.
| Problem | Likely Cause | Fix |
|---|---|---|
| No strings / beans look unchanged | Temperature too low; starter not properly distributed; sterilization killed the bacteria | Check your fermenter temperature with a thermometer — it should read 43–45°C (109–113°F). Make sure you didn’t add starter when the beans were still too hot (above 50°C kills the bacteria). Ensure every bean contacted the starter. |
| Strong ammonia smell | Over-fermentation — fermented too long or at too high a temperature | Move to the refrigerator immediately. A mild ammonia note is normal and will mellow within 3–5 days of refrigerator resting. If the smell is overwhelming and doesn’t improve after a week, discard and start fresh. Next batch: shorten fermentation to 20–22 hours and verify temperature isn’t above 46°C. |
| Beans are wet and slimy but won’t form strings | Under-fermentation — needs more time | Return to the fermenter for another 4–6 hours at 45°C. Check at 2-hour intervals. Stringiness develops as the Bacillus subtilis completes its work — it’s the polyglutamic acid the bacteria produce that creates the signature natto strings. |
| White powdery coating on beans | This is normal — it’s the Bacillus subtilis colony | Nothing to fix. A white or off-white coating on the surface of natto is completely normal and a sign of good fermentation. The strings form underneath. Stir before eating. |
| Pink, green, or black spots | Contamination from competing mold or bacteria | Discard the batch. Next time, sterilize all equipment with food-grade alcohol (isopropyl or ethanol) and work quickly when transferring warm beans. Avoid handling the beans with bare hands after sterilizing containers. |
| Beans are still hard after fermentation | Soybeans weren’t cooked soft enough before fermenting | Soybeans need to be fully soft before inoculating — they should smush between your fingers with almost no pressure. Steam or pressure cook longer next time. Hard beans don’t ferment evenly. |
Alternative Fermenter Options for Natto
The Tanica Yogurtia is the easiest tool for making natto at home because it holds a steady 45°C automatically. But it’s not the only option. Here’s how other methods compare: For more, see our guide on Tanica Yogurtia review.
| Fermenter | Temperature Range | Natto Suitability | Notes |
|---|---|---|---|
| Tanica Yogurtia | 25–65°C (precise) | ⭐⭐⭐⭐⭐ Excellent | Set to 45°C. Purpose-built for natto and yogurt. Consistent results every time. Available on Amazon Japan. |
| Dedicated Natto Maker (e.g., Natto King) | Fixed ~43°C | ⭐⭐⭐⭐⭐ Excellent | Pre-set for natto fermentation. Slightly less versatile than the Yogurtia but purpose-built. Good option if natto is all you plan to make. |
| Food Dehydrator | Varies by model | ⭐⭐⭐⭐ Very Good | Set to 43–45°C. Works well for large batches. Place soybeans in trays lined with cheesecloth. Check that your model actually reaches these temperatures accurately — cheaper units can run hot. |
| Bread Proofer (Brod & Taylor) | Up to 49°C (120°F) | ⭐⭐⭐ Good (with caution) | I used this for my first attempt and it over-fermented — but the issue was duration, not the proofer itself. The Brod & Taylor can hold 45°C. Use a thermometer inside to verify, and check the natto at the 18-hour mark. Don’t let it go more than 22 hours at this temperature. |
| Instant Pot (Yogurt mode) | “Normal” ~40°C / “More” ~52°C | ⭐⭐ Marginal | “Normal” mode is slightly too cool for optimal fermentation; “More” mode runs too hot. Some makers place the beans in a sealed container inside the Instant Pot with water, then use “Warm” mode — but results are inconsistent. Better to use a dedicated tool. |
| Oven light method | Unpredictable (~30–45°C) | ⭐⭐ Possible but risky | Place beans in the oven with only the light on, wrapped in towels. Temperature depends entirely on your oven light wattage and ambient temperature. Use a thermometer to verify you’re in the 43–45°C range before committing your beans. Works better in warm weather. |
My recommendation: The Yogurtia is worth the investment if you plan to make natto, yogurt, or shio koji regularly. It pays for itself quickly.
Homemade Natto FAQ
What temperature should I ferment natto at?
Natto ferments best at 43–45°C (109–113°F). Below 40°C, the Bacillus subtilis bacteria become too sluggish to ferment properly. Above 50°C, the bacteria die. The sweet spot is 45°C for 20–24 hours. Always verify with a thermometer — your fermenter’s dial may not be perfectly accurate.
How long does it take to make homemade natto?
Active prep takes about 2–3 hours (soaking or boiling, then steaming the soybeans). Fermentation is 20–24 hours at 45°C. Then the natto needs to rest in the refrigerator for at least 3–5 days before the flavor is at its best — the bacteria continue to work slowly and the ammonia notes mellow. Total time from start to best flavor: about 6–7 days.
Can I use store-bought natto as a starter instead of nattomoto powder?
Yes, and many home fermenters prefer it for flavor reasons. Take about 1/4 of a single-serving pack of store-bought natto and mix it thoroughly into your cooked soybeans. Break up any clumps so every bean makes contact with the starter. The live Bacillus subtilis in packaged natto is sufficient to inoculate a full batch.
Why does my homemade natto smell so strongly of ammonia?
Ammonia is a natural byproduct of protein breakdown during fermentation — all natto has some ammonia character. If the smell is intense, your natto has over-fermented: it ran too hot, too long, or both. Move it to the refrigerator immediately. Over 5–7 days of cold resting, the ammonia will significantly mellow. Next time, ferment for 20–22 hours and verify your temperature doesn’t exceed 46°C.
How do I know when homemade natto is done fermenting?
Your natto is ready when: (1) you see visible white strings when you lift the beans with a spoon; (2) the beans have a light white coating from the bacterial colony; and (3) there’s a distinct earthy, fermented smell. Taste a bean — it should have the characteristic natto flavor, slightly bitter and nutty. At 24 hours at 45°C, most batches are done.
What soybeans should I use for making natto?
Use small natto soybeans (kotsubu daizu), not regular large soybeans. Natto soybeans are smaller — about 5mm in diameter — which allows the Bacillus subtilis to penetrate the bean more completely, resulting in better flavor and texture throughout. In Japan, kotsubu (small grain) natto is the standard — those tiny beans you see in the little polystyrene packages.
How long does homemade natto last?
Freshly fermented natto keeps in the refrigerator for 7–10 days. Flavor actually improves over the first 5–7 days as it rests. For longer storage, portion the natto into small containers and freeze for up to 1 month. Thaw overnight in the refrigerator before eating. Do not refreeze once thawed.
Is homemade natto as healthy as store-bought?
Yes, and in some ways more so. Homemade natto fermented at the right temperature has active Bacillus subtilis and the full complement of nattokinase enzymes and vitamin K2 (MK-7) associated with natto’s health benefits. The texture is often superior to store-bought — firmer and more satisfying — and you can control the fermentation time to suit your taste.
have you eaten natto before?
Some people don’t like it and some people love it, so I’m curious to see what you think.
if so what do you like to put on it?
if not, do you think you’d give it a try?
lmk in the comments!